Lawns are the thirstiest part of a garden and need the most regular watering. A properly installed lawn irrigation system keeps the grass healthy and saves a lot of water in the long run. But before installation, understanding how the cost is calculated and which factors affect the price is critical to making the right investment decision.

In this guide we look at the factors that affect the cost of installing a lawn irrigation system, how the cost is calculated, the cost differences between system types and the long-term cost picture. The principles apply to everything from home gardens to large-scale projects.

For detailed information on our landscape infrastructure and irrigation services, visit our service page.

Factors That Affect the Cost of a Lawn Irrigation System

The cost of a lawn irrigation system can’t be expressed as a single figure; it depends on many variables. All of these factors need to be considered for an accurate estimate.

Size of the Area

The most basic driver of cost is the area of lawn to be irrigated in square metres. But cost does not rise in direct proportion to area; the unit cost falls on larger areas because fixed costs such as the main line infrastructure and controller are spread over more ground.

Shape of the Area and Number of Zones

A regular, geometric area needs fewer heads and a simpler line layout than an irregular, fragmented one. Complex shapes, obstacles (trees, pools, buildings) and different irrigation zones add to the system’s complexity and therefore its cost.

System Type and Head Type

Pop-up sprinklers, rotor heads and equipment with different flow rates have different costs. Rotor heads are more efficient and economical for large areas, while pop-up sprinklers are preferred for small, irregular areas.

Water Source and Pressure

If the existing water pressure is sufficient, no extra equipment is needed. If pressure is insufficient, a pump must be added to the system, which is a significant cost item. Water tanks, booster sets and filter systems also affect cost depending on the water source.

Level of Automation

There is a cost difference between a basic timer system and a smart system with moisture and rain sensors that can be controlled remotely. Automation raises the initial cost but pays for itself over time through water savings.

Equipment Quality

The quality of pipes, heads, valves and controller determines both the cost and the life of the system. Low-quality equipment may look like a saving at first, but frequent breakdowns and a short life make it more expensive in the long run.

How Is the Cost Calculated?

A professional cost calculation for a lawn irrigation system follows a set method. The process begins with a site visit.

1. Measuring and Analysing the Area

The area to be irrigated is measured, along with its shape and obstacles. Soil structure and slope are assessed. These data form the basis of the system design.

2. Assessing the Water Source

The available flow rate and pressure are measured. These values determine how many heads can run at once and therefore the number of zones. If pressure is found to be insufficient, the cost of a pump is added.

3. System Layout and Zoning

The area is divided into zones according to water needs and pressure capacity. The number of heads, pipe length and number of valves needed for each zone are determined. This layout pins down the quantity of materials and therefore the cost.

4. Materials and Labour

Based on the layout, the total quantity of materials (pipes, heads, valves, controller, fittings) and labour (excavation, laying, installation, testing) are calculated. These two items make up the total cost.

For a cost estimate tailored to your project, you can request a site visit. After the site analysis, we provide a transparent, itemised quote.

Cost Items: What Are You Paying For?

The cost of a lawn irrigation system is made up of the following main items:

Pipes and line materials: main and distribution pipes, fittings.

Heads: pop-up sprinklers or rotor heads; the number depends on the size and shape of the area.

Valves and manifold: solenoid valves that control each zone.

Controller: the timer that runs the irrigation programme; in smart systems, sensors are included.

Pump and pressure equipment: needed if water pressure is insufficient.

Labour: excavation, laying lines, installation, testing and calibration.

Cost Comparison by System Type

Pop-up Sprinkler Systems

Suitable for small and medium-sized lawns. The number of heads is relatively high, but each head is inexpensive. They offer flexibility in irregular areas. They have a moderate initial cost.

Rotor Head Systems

The most efficient solution for large lawns. They cover a large area with few heads, which lowers the unit cost on big sites. They are preferred for large green areas such as hotels, residential complexes and sports fields.

Smart (Sensor-Based) Systems

Moisture and rain sensors and remote control can be added to either system type. They increase the initial cost but deliver measurable savings on the water bill by preventing unnecessary watering. In the long run they are the most economical option.

Initial Cost or Long-Term Cost?

The most common mistake when evaluating a lawn irrigation system is looking only at the initial cost. The real cost is the total cost over the life of the system.

Water savings: a well-designed system with sensors saves a lot of water compared with manual watering and inefficient systems. In areas where water is expensive, these savings pay back the system quickly.

Maintenance and repair: a system built with quality equipment rarely breaks down; low-quality systems need frequent repairs.

Lawn health: proper watering keeps the lawn healthy and removes the cost of re-turfing. Too little or too much water leads to lawn loss and renewal costs.

System life: a well-installed system works for decades; cheap systems may need replacing within a few seasons.

The Right Ways to Reduce Cost

Zone correctly. Well-designed zoning saves both water and energy.

Choose quality equipment, but no more than you need. Equipment matched to the need avoids both overspending and poor quality.

Plan the system together with the landscape. A system added later risks damaging the existing landscape and adds excavation costs.

Add sensors. A small cost at the start is repaid over time through water savings.

Lawn Irrigation Systems with Işık Peyzaj

At Işık Peyzaj we handle the design, cost calculation, installation and maintenance of lawn irrigation systems. Our process starts with a site visit, after which we provide a transparent, itemised cost quote specific to your site. By planning the system as an integral part of the landscape design, we deliver both efficiency and a long service life.

For general information on irrigation systems, you can read our guide to garden irrigation systems, visit our infrastructure services or request a meeting for a cost estimate through our contact form.
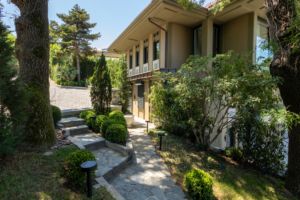
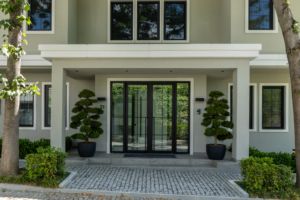
Decorative gravel and crushed stone are among the most practical and versatile materials in landscaping. Low cost, easy drainage, no maintenance and a wide choice of colours and textures make them indispensable in residential, commercial and public projects alike. Used correctly, gravel adds both functional and aesthetic value to a garden.

In this guide we look at the types of decorative gravel and crushed stone, where to use them, how to install them and how to use them most effectively in a garden.

You can find out about gravel and crushed stone installations as part of our hardscape services.

The Difference Between Gravel and Crushed Stone

The two terms are often confused, but they are different. Gravel is stone rounded by natural processes (rivers, the sea), with smooth edges. Crushed stone is angular stone produced by breaking rock.

This difference determines where each is used. Round gravel is comfortable to walk on and attractive on decorative surfaces, but it shifts more easily underfoot. Angular crushed stone locks together into a more stable surface, so it is preferred for footpaths and as a base for driveways.

Types of Decorative Gravel and Crushed Stone

River Gravel

Round, smooth gravel taken from riverbeds. It gives a natural, calm look. It is widely used on garden surfaces, between plants and in decorative areas, and comes in different sizes.

Marble Chippings

With white, cream and light tones, it gives an elegant, bright look. Its light colour makes a space feel larger and more open. It is preferred in modern gardens and wherever a bright surface is wanted. It absorbs little heat from the sun.

Basalt Chippings

Its dark grey-black colour gives a modern, strong aesthetic. It pairs very well with contemporary architecture and creates visual depth by contrasting with light-coloured plants and flowers.

Coloured Decorative Gravel

Natural stone gravel in red, yellow and pink tones is used to create accents in specific areas. It should be used carefully, as too many colours can break up the unity of the garden.

Large Decorative Stones

Large decorative stones and boulders are used to create focal points on gravel surfaces and a natural composition. They are a key element of rock gardens.

Where to Use Gravel and Crushed Stone

Ground Cover and Between Plants

Gravel is an ideal ground cover between plants and on bed surfaces. It reduces evaporation from the soil, suppresses weeds and helps rainwater soak into the ground. It also protects plant roots from heat.

Footpaths and Trails

Crushed stone is used to build footpaths because it compacts into a stable surface. Gravel paths are a natural and economical solution, but they should be supported with edging.

For all the details of footpath design, see our guide to garden footpath design.

Rock Gardens

Gravel and decorative stones are used with drought-tolerant plants to create rock gardens. These schemes are both low-maintenance and visually striking, and in a Mediterranean climate they work perfectly with succulents and aromatic plants.

Drainage Areas

Gravel is also used functionally to stop water pooling and to aid drainage. In areas where rainwater collects, around buildings and over drainage lines, a layer of gravel lets water drain away in a controlled way.

Dry Creek Design

Dry creek beds made with gravel and decorative stones give the impression of a water feature and also act as a functional drainage solution that channels rainwater. They are increasingly popular in sustainable landscape design.

How to Install Gravel

A long-lasting, neat gravel surface depends on the right technique. Gravel laid directly on soil soon mixes into it, and weeds grow up through it.

1. Prepare the Ground

The area is cleared, levelled and compacted. Existing weeds and roots should be removed.

2. Lay Geotextile (Separation Fabric)

Geotextile fabric is the key to a successful gravel installation. Laid between the soil and the gravel, this permeable fabric stops the gravel mixing into the soil and suppresses weeds while letting water through. If this layer is skipped, the gravel soon sinks into the soil and weeds come up through it.

3. Edge the Area

The edges of the gravel area should be contained with kerbs, metal edging or stone. Without edging, the gravel spreads into neighbouring areas and looks untidy.

4. Spread and Level the Gravel

The gravel is spread to a suitable depth (usually 4–6 cm) and levelled. Gravel spread too thinly exposes the fabric below; gravel spread too thickly is hard to walk on.

For proper infrastructure and drainage, you can make use of our landscape infrastructure services.

Benefits of Landscaping with Gravel

Low cost: economical compared with natural stone and other hardscape materials.

Low maintenance: once installed correctly, it needs no maintenance for a long time; periodic top-ups are enough.

Excellent drainage: highly permeable, it prevents water pooling.

Water savings: used as ground cover, it reduces evaporation and lowers plants’ water needs.

Flexibility: easy to add to, move and rearrange.

What to Watch Out for When Using Gravel

Don’t skip the geotextile. Without fabric, gravel mixes into the soil and weeds grow — this is the most common mistake.

Don’t use round gravel in high-traffic areas. Round gravel shifts underfoot; compacting crushed stone should be used for footpaths.

Don’t neglect edging. Gravel without edging spreads.

Avoid too many colours. Too many different gravel colours break up the unity of the garden; a limited palette looks more elegant.

Gravel and Crushed Stone Installations with Işık Peyzaj

At Işık Peyzaj we manage the entire process of decorative gravel and crushed stone installations professionally, from choosing materials and preparing the ground to laying geotextile and edging. We plan rock gardens, dry creeks and drainage solutions in harmony with the landscape as a whole.

You can explore our hardscape services, see the projects we have completed on our references page or request a meeting through our contact form.

A garden’s footpaths determine how that garden is experienced. Paths don’t just get you from one point to another; they divide the garden into zones, direct views and create rhythm and a sense of discovery. A well-designed footpath forms the visual backbone of the landscape, while a poorly planned one disrupts the garden’s flow and use.

In this guide we look at the basic principles of garden footpath design, material options, installation techniques and common mistakes. The information applies at every scale, from home gardens to hotels and public spaces.

For detailed information on our hardscape services, visit our service page.

Basic Principles of Footpath Design

Follow Natural Lines of Movement

A good footpath is designed around how people actually move. People take the shortest, most natural route between two points. Paths that ignore this line of movement go unused; people cut across the lawn and wear down the edges of the path. The design should anticipate real behaviour.

Width and Scale

Footpath width depends on its purpose. A garden trail for one person and a main axis where two people can walk side by side need different widths. As a general starting point, a minimum of 120 cm suits main paths and 60–90 cm suits secondary trails. Scale should also be in proportion to the size of the garden.

Straight or Curved?

Straight paths feel formal, clear and quick; they suit entrances and axial layouts. Curved paths create a sense of discovery, make the garden feel larger and give a natural flow. A curve should have a purpose — going around a group of plants or opening up a view. Curves without a reason look artificial.

Footpath Material Options

Natural Stone

The most durable and attractive material for footpaths. Granite, travertine, basalt and slate are long-lasting options that age beautifully. Neatly cut slabs give a formal look, while irregular broken stone (crazy paving) creates a natural, rustic feel.

For types of natural stone and their technical properties, see our guide to natural stone paving.

Stamped Concrete

An economical option made by patterning a concrete surface, which can imitate natural stone or timber. It is a cost-effective solution for wide footpaths and high-traffic areas. It is durable and comes in a range of patterns.

Concrete Slabs and Pavers

Precast concrete slabs give a regular, modern look. Large-format slabs give a clean aesthetic on wide paths. Leaving grass or gravel between them can also create a soft transition.

Gravel and Crushed Stone

An economical option that aids drainage and feels natural. The sound it makes underfoot is part of the atmosphere in some gardens. But remember that gravel paths need edging and periodic top-ups.

For detailed information on decorative gravel and crushed stone installations, see our dedicated guide.

Timber and Composite

Timber decking or composite walkways give a warm feel, especially where they connect to terraces and around pools. Durable outdoor species (teak, iroko) or maintenance-free composite should be chosen.

You can find out more about our landscape timber works.

Stepping Stones

Individual stones set at intervals in grass or gravel give a light, natural route. They are an elegant way to create a path without breaking up the garden’s green texture. Spacing them to match a natural stride is important for comfort.

The Footpath Installation Process

How long a footpath lasts depends as much on the quality of installation as on the material.

1. Setting Out the Route and Excavation

The route is marked out and excavated to a suitable depth. The depth depends on the material and the thickness of the sub-base. Insufficient excavation leads to sinking and deterioration later on.

2. Preparing the Sub-base

The excavated ground is compacted and a suitable aggregate (crushed stone) sub-base is laid. This sub-base provides the path’s load-bearing capacity and drainage. If compaction is insufficient, the path settles and becomes uneven over time.

3. Drainage Fall

The footpath should be laid with a slight fall (at least two percent) to shed rainwater. Paths where water collects are uncomfortable to use and deteriorate over time. In areas at risk of frost, drainage is especially critical.

4. Laying the Surface and Edging

The chosen material is laid with the appropriate technique. On gravel and irregular stone paths, edging stops the material spreading. With natural stone and slabs, joint widths and expansion gaps must be left correctly.

For proper infrastructure and drainage, you can make use of our landscape infrastructure services.

Footpaths and Lighting

Footpaths should be lit for safety and atmosphere at night. Low-level path lights, recessed ground spots or path-side lighting provide safe passage and enhance the garden’s night-time atmosphere. Lighting works best when it is planned together with the path layout.

You can find out more about our landscape lighting solutions.

Footpaths by Project Type

Homes and villa gardens: natural stone, stepping stones and winding trails create an intimate feel. Aesthetics and personal use come first.

Hotels and resorts: paths need to be wide, durable and suited to heavy traffic. Natural stone and stamped concrete stand out in these projects.

Public spaces and parks: accessibility standards, high durability and ease of maintenance are decisive. Surfaces suitable for disabled access are mandatory.

You can see our work across different project types on our reference projects page.

Common Mistakes in Footpath Design

Ignoring natural lines of movement. If there is no path where people want to go, they cut across the lawn and the path loses its purpose.

Neglecting the sub-base. An inadequate sub-base and poor compaction cause even the best surface to sink quickly.

Skipping drainage. Paths without a fall hold water, which spoils both comfort and the surface.

The wrong width. Paths that are too narrow are hard to use; unnecessarily wide paths eat into the garden’s green space.

Forgetting edging. On gravel paths especially, material spreads without edging and the path breaks up.

Footpath Design with Işık Peyzaj

At Işık Peyzaj we manage the entire footpath process, from advice on choosing materials and preparing the sub-base to drainage solutions and integrated lighting. We bring the experience gained on residential, hotel, commercial and public projects to every project with our ISO 9001 certified quality standard.

You can explore our hardscape service page or request a meeting about your project through our contact form.

When people think of landscaping, plants usually come to mind first. Yet the backbone of a good landscape is the hardscape. Footpaths, terraces, retaining walls, steps, seating areas and paving determine how a space is used, moved through and lived in. Plants are the soft layer laid over this framework.

In this guide we look at what hardscape landscaping is, which materials are used for which purpose, the technical details of installation and the principles of design. The information applies at every scale, from home gardens to large commercial projects.

For detailed information on our hardscape services, visit our service page.

What Is Hardscape?

Hardscape refers to the non-living, structural components of a landscape. Everything other than the planted elements (softscape) falls into this category: stone, concrete, timber, metal, water features and the structural elements they form.

In a good landscape design, hardscape and softscape work in balance. Too much hard surface feels cold and rigid, while too little makes the space hard to use. This balance determines the success of the design.

Hardscape Elements

Paving

The surfaces that form footpaths, terraces and seating areas. Natural stone, concrete, stamped concrete, porcelain and timber decking are the most common options. Paving is the largest and most heavily used hardscape element in a landscape.

Retaining and Boundary Walls

Used to hold back soil on slopes, create terraces and define the boundaries of a space. Natural stone, concrete and gabion (stone-filled cage) systems are preferred. Retaining walls serve both structural and aesthetic purposes.

Steps and Ramps

Elements used to deal with changes in level. Designing them correctly is critical for both function and safety. Compliance with accessibility standards is mandatory, especially in public and commercial projects.

Pergolas, Gazebos and Shade Structures

Structures that provide shade, define a space and create vertical emphasis. They are made from timber, metal and composite materials, and directly increase the comfort of outdoor areas.

Our landscape timber works and metal works cover the manufacture and installation of these structures.

Water Features

Pools, ponds, waterfalls, water curtains and fountains are hardscape elements that enrich the landscape’s visual and acoustic atmosphere.

Find out about our water feature services.

Hardscape Materials and Their Uses

Natural Stone

Granite, travertine, basalt, limestone and slate are the most durable and attractive outdoor materials. Chosen and installed correctly, they keep their value for decades and age beautifully.

For types of natural stone, their technical properties and uses, see our guide to natural stone paving.

Stamped Concrete

An economical, durable surface made by patterning concrete with moulds while it is still fresh. It can imitate natural stone or timber. It is a cost-effective solution for high-traffic areas, car parks and large surfaces.

Advantages: economical compared with natural stone, quick to lay on large surfaces, a range of patterns and colours, high durability.

Note: the protective surface sealer must be renewed periodically; otherwise wear and fading can appear over time.

Timber and Composite Decking

Gives a warm, natural feel on terraces, around pools and on walkways. Durable species such as teak and iroko are preferred for natural timber, with maintenance-free composite decking as the alternative.

Natural timber: a warm look and natural texture, but needs periodic oiling.

Composite decking: maintenance-free and long-lasting, but doesn’t fully match the texture of natural timber.

Concrete and Precast Elements

In modern landscaping, concrete is not just an infrastructure material but a design element. Polished concrete floors, precast concrete seating units and concrete kerbs are often used in contemporary projects.

Gravel and Aggregate

A low-cost surface material that aids drainage and feels natural. It is used for decorative gravel surfaces, as ground cover between plants and in drainage areas.

The Hardscape Installation Process

Hardscape installation is one of the most technical and critical stages of landscaping. Hardscape that is installed incorrectly soon sinks, cracks or causes water problems.

1. Prepare the Ground

The foundation of all hardscape work is solid ground preparation. The ground is excavated, levelled and compacted. Work laid on loose or poorly compacted ground sinks over time. This stage is the most critical step in determining how long the hardscape will last.

2. Drainage Design

Hardscape areas should be designed to shed rainwater. A minimum fall of two percent, drainage channels on surfaces where water collects and, where needed, an underground drainage system are planned. When drainage is neglected, standing water causes both discomfort and damage to the surface.

We design and install drainage systems as part of our landscape infrastructure services.

3. Foundation and Sub-base

A sub-base suited to the type of paving (aggregate, concrete screed or sand bed) is prepared. This layer spreads the load of the paving and ensures it beds down evenly.

4. Laying the Surface

The chosen material is laid in line with its technical rules. Details such as joint widths and expansion gaps for natural stone, ventilation gaps for timber decking and the correct curing time for stamped concrete are critical at this stage.

5. Jointing and Finishing

Joints are filled, the surface is cleaned and the necessary protective coatings are applied. Water-repellent impregnation for porous stone, protective oil for timber and surface sealer for concrete are applied at this stage.

Hardscape Design Principles

Hardscape–Softscape Balance

The secret of good landscaping is the balance between hard surfaces and planted areas. As a general approach, hardscape makes up about a third of the area and planting about two thirds, but the ratio varies with the purpose of the project. In heavily used commercial areas the share of hardscape rises, while planting dominates in gardens made for relaxing.

Material Continuity

Using many different materials fragments a space and makes it feel cluttered. A limited number of materials, a repeated language and a harmonious colour palette bring the space together.

Flow and Circulation

Footpaths should follow natural lines of movement. A design that considers how people actually move is both functional and comfortable. Artificial, forced routes go unused and get worn down by shortcuts.

Scale and Proportion

Hardscape elements should be in proportion to the scale of the space. Small paving units look scattered in a large area, while large elements feel overpowering in a small one.

Common Mistakes in Hardscape Projects

Underestimating ground preparation. Poor compaction and a faulty foundation cause even the best material to sink quickly.

Ignoring drainage. Hardscape built without planning for water ends in standing water and surface damage.

Matching the wrong material to the use. Slippery polished stone around a pool or non-durable material in a high-traffic area are common mistakes.

Not leaving expansion gaps. Material that expands with temperature changes cracks if there is not enough space.

Not balancing hardscape and softscape. Too much hard surface feels cold and rigid, and should be softened with planting.

Işık Peyzaj Hardscape Works

At Işık Peyzaj we manage the entire hardscape process, from advice on choosing materials and ground preparation to drainage design, installation and finishing. We carry out natural stone, stamped concrete, timber decking, water feature and metal structure works with our ISO 9001 certified quality standard.

For your hardscape project, you can explore our service page, see the projects we have completed on our references page or request a meeting through our contact form.

Irrigation is the most critical yet most neglected component of a landscape project. Even the best design, the finest plants and the most careful installation can be damaged within a few seasons by a badly planned irrigation system. The right irrigation system, on the other hand, keeps plants healthy, cuts water use significantly and keeps the maintenance burden to a minimum.

In this guide we look at the types of garden irrigation systems, the stages of installing automatic irrigation, the factors that affect system choice and the technical details of good irrigation planning. The information applies at every scale, from home gardens to large commercial projects.

For detailed information on our landscape infrastructure and irrigation services, visit our service page.

Why an Automatic Irrigation System?

Manual watering may be possible in a small garden, but it has many disadvantages. Automatic irrigation systems eliminate them.

Water savings: a well-designed automatic system delivers the right amount of water directly to the root zone. This saves a significant amount of water compared with surface watering.

Consistency: plants are watered regularly and evenly. The over- and under-watering that is unavoidable with manual watering disappears.

Saving time and effort: the system runs automatically on a timer. This is a critical advantage, especially in large gardens and properties where the owner is not always present.

Plant health: regular water at the root zone encourages deep rooting and healthy growth.

Types of Irrigation System

Garden irrigation systems differ by method and plant type. Most projects use more than one system together.

Drip Irrigation System

The most efficient irrigation method, delivering water slowly and directly to the root zone, drop by drop. Losses to evaporation and runoff are minimal.

Advantages: the highest water efficiency, targeted watering at the root zone, fewer weeds (water goes only to the plant) and lower risk of leaf disease (leaves stay dry).

Uses: groups of trees and shrubs, flower beds, vegetable gardens, vertical gardens, container plants and drought-sensitive species.

Drip irrigation is the standard choice in regions where water is scarce and in dry climates.

Sprinkler System

A system that sprays water over a wide area like rain. It is ideal for large, uniform surfaces.

Advantages: fast, even watering of large areas, ideal for lawns, little intervention after installation.

Uses: lawns, large green surfaces, sports fields and parks.

Note: evaporation losses are high when sprinklers run in the heat of the day. Early morning or evening should be preferred. In windy conditions, water distribution can be uneven.

Rotor and Pop-up Systems

These are advanced versions of the sprinkler system. Pop-up heads rise from the ground during watering and retract when it ends, so they don’t get in the way of mowing or use. Rotor heads rotate to water large areas and give efficient coverage on big surfaces.

Uses: large lawns, hotel and residential complex green areas, public landscape areas and sports facilities.

Soaker Hose Systems

A system whose porous hose releases water slowly into the soil along its length. It is a practical solution for plants set in rows and for hedges.

Stages of Installing an Automatic Irrigation System

Installing a professional automatic irrigation system follows a defined engineering process. Every stage is critical for the system to work efficiently and last.

1. Site Analysis and Water Source Assessment

The garden’s area, plant species, soil structure and slope are assessed. The flow rate and pressure of the water source are measured. These data determine the system’s capacity and how it is divided into zones. If water pressure is found to be insufficient, a pump may need to be added. This should be resolved at the design stage.

2. Zoning

The garden is divided into zones with similar water needs. A lawn and a group of trees, or a shady area and a sunny one, have different water needs. Each zone needs its own irrigation line and its own programme. Connecting the whole garden to a single line over-waters some parts and under-waters others — this is the most common irrigation design mistake.

3. Laying Lines and Connections

The main and distribution pipes are laid along the planned route. Pipes are buried underground and connections are tested for leaks. Pipe quality determines how long the system lasts — low-quality pipe leaks and clogs after a few seasons.

4. Controller and Automation

The controller (timer) that runs the irrigation programme is installed. Moisture sensors, rain sensors and remote control have become standard in modern systems. A rain sensor stops the system running unnecessarily on rainy days, saving water and protecting plant health.

5. Testing and Calibration

The system is run and the water distribution in each zone is checked. Head positions, flow rates and run times are calibrated to the plants’ needs. If this stage is skipped, the system won’t work efficiently even though it is installed.

For professional irrigation system design and installation, you can make use of our infrastructure services.

Factors That Affect System Choice

Climate and Water Scarcity

In dry regions with little summer rain, drip irrigation takes priority. Wherever water is scarce, efficiency becomes the top priority. In regions with plenty of rain, backup irrigation can be designed on a smaller scale.

Plant Species

Trees and shrubs want deep, infrequent watering, while lawns need more frequent, shallow watering. The system should be designed in zones according to the variety of plants in the garden.

Garden Scale

Simple drip systems are enough for small home gardens, while hotels, residential complexes and public spaces need centrally controlled, multi-zone systems that can be monitored remotely.

Budget and Long-Term Cost

Simple systems that seem cheap at first can cost more in the long run because of wasted water and frequent breakdowns. Quality equipment and proper design pay for themselves through water savings and low maintenance costs.

Irrigation System Maintenance

Once installed, an automatic irrigation system needs regular maintenance. Neglecting it reduces the system’s efficiency and leads to plant losses.

Start-of-season check: at the start of the season, all lines, heads and connections should be checked and any winter damage repaired.

Filter cleaning: in drip systems, filters should be cleaned regularly; blockages stop the emitters working.

Head adjustment: sprinkler and rotor heads lose direction and flow over time and need periodic calibration.

Winter preparation: in areas at risk of frost, the system should be drained before winter and remaining water in the lines purged to protect against frost.

Common Mistakes in Irrigation Systems

Not zoning. Connecting plants with different water needs to a single line is the most common and most costly mistake.

Watering in the heat of the day. Watering at midday wastes water through evaporation and can scorch leaves. Early morning or evening is ideal.

Not using sensors. A system without rain and moisture sensors runs on rainy days too, wasting water and harming plants.

Low-quality equipment. Cheap pipes and fittings may look like a saving in the short term, but leaks and frequent breakdowns make them more expensive in the long run.

Işık Peyzaj Irrigation Solutions

At Işık Peyzaj we design, install and maintain automatic irrigation systems for homes, villas, residential complexes, hotels and public spaces. By planning the system as an integral part of the landscape design, we meet the water needs of each plant group separately.

For your irrigation project, you can explore our landscape infrastructure services or request a meeting through our contact form. For every stage of professional landscape design, take a look at our comprehensive guide.

In design terms, a small garden is more challenging than a large one. Every square metre must be used carefully, no corner can be wasted and a sense of space must be created even in a tight area. Designed well, a small garden can become a far more striking and liveable space than a large one.

In this guide we look at how to make the most of the space in small gardens, design techniques that create a sense of openness, and choosing the right plants and materials. The principles apply to every limited space, from apartment gardens and terraces to narrow villa gardens and courtyards.

Basic Principles of Small Garden Design

In small spaces, the success of a design depends on a few basic principles. These make the space look larger than it is and make it more usable.

Think Vertically

A small garden’s greatest resource is not the ground but its vertical surfaces. Walls, fences and boundaries are all usable space for plants. Vertical garden panels, climbers and hanging planters add green volume without taking up ground.

Vertical garden systems are particularly effective in tight spaces. You can find detailed information about green wall installations.

Fewer, More Effective Plants

Using many different species in a small space creates visual clutter and makes the space look even smaller. A limited number of species, a repeated planting language and a clear colour palette make the space look orderly and larger. ’Less is more’ is the right approach in a small garden.

Multi-Functional Design

In a small garden, every element should do more than one job. A seating area can also provide storage, and a planted wall can give both privacy and beauty. A step can be both a transition and a place to sit. Single-purpose elements are a luxury in a small space.

Keep Continuity

Continuity in paving, plant choice and colour palette unifies a space and makes it feel larger. Using different materials in different areas breaks a small garden into pieces and makes it feel smaller. A single paving material visually unites the whole area.

Design Techniques That Make a Space Look Larger

Diagonal Layout

Laying paving and paths diagonally rather than parallel to the walls lets the eye follow the longest line and makes the space look larger. This simple technique creates a noticeable sense of space in small gardens.

Layered Planting

Arranging plants in layers, low at the front and tall at the back, creates a sense of depth. When the eye perceives more than one layer, the space looks deeper than it is.

Light Colours and Mirrors

Light-coloured walls, paving and garden furniture reflect light and open up the space. Strategically placed mirrored surfaces are also an effective way to create an illusion of depth in small gardens.

Hidden Corners and a Sense of Discovery

Rather than making a small garden fully visible at a glance, hiding a corner behind plants or curving part of the path creates a feeling that ’there’s more’. This makes the space feel larger than it is.

Choosing the Right Plants for a Small Garden

Compact, Slow-Growing Species

In a small garden, fast-growing, large species soon overwhelm the space. Compact species with controlled growth should be chosen. Dwarf shrubs, compact ground covers and species that can be shaped stay manageable in small spaces.

Upright Species

Species that grow tall rather than wide save ground in a small garden. Slender, upright plants — cypress species, for example — create vertical emphasis in a narrow space without taking up much ground.

Interest Across the Seasons

In a small garden, every plant should earn its place for a long time. Instead of species that flower for one season and look dull for the rest of the year, choose ones that offer foliage, form or colour all year round.

For advice on choosing plants suited to your region and space, you can consult our softscape services.

Hardscape and Choosing Materials

In a small garden, the paving material directly affects how the space is perceived. Large-format paving — large stone or ceramic slabs — creates fewer joint lines and makes the space look larger. Small, multi-piece paving makes the space look busier and narrower.

To choose the right paving material, see our hardscape services and our guide to natural stone paving.

Water Features and Lighting

Small-Scale Water Features

Even in a small garden, water can bring a powerful atmosphere. A wall fountain, a small pond or a minimal water curtain increases the sense of space and its sound is calming. A water feature doesn’t have to be large; positioned correctly, it is effective on a small scale too.

Find out about our water feature services.

Making the Space Feel Larger with Lighting

The right lighting completely transforms a small garden at night. Uplights on walls and plants create depth, and wayfinding lights open up the space. A well-designed lighting plan turns a small garden into a space that can be used in the evening too.

You can enhance your small garden’s night-time atmosphere with our landscape lighting solutions.

Types of Small Garden and Solutions

Apartment and Roof Terraces

Limited ground and load limits are the main challenges here. Lightweight planter systems, vertical garden panels and compact plant choices stand out. On roof terraces, the structural load capacity must always be assessed.

Courtyards

For courtyards, which are usually shady and enclosed by four walls, shade-tolerant species and vertical green surfaces are ideal. Light-coloured walls and good lighting make up for the limited daylight in these spaces.

Narrow Villa Gardens

In long, narrow gardens, dividing the space into zones — seating, green, circulation — makes it look larger and more functional. Diagonal layouts and layered planting are especially effective in this type of garden.

Common Mistakes in Small Garden Design

Filling the space with plants. In a small garden, empty space means openness. Filling every corner overwhelms the space.

Using too many different materials. A variety of materials on the ground, walls and furniture breaks up and narrows a small space.

Choosing species that become huge. A sapling that looks small today can cover the entire space within a few years. Always consider a species’ mature size.

Ignoring vertical space. Walls and vertical surfaces are a small garden’s most valuable resource; leaving them bare wastes space.

Small Garden Design with Işık Peyzaj

At Işık Peyzaj we apply the same design discipline to small gardens as to large projects. By planning vertical gardens, hardscape, water features and lighting as efficiently as possible in limited spaces, we turn small gardens into liveable, striking places.

If you would like ideas for your garden or to discuss a project, you can explore all our services or reach us through our contact form.

Many people planning a landscape project assume that the terms ’landscape architect’, ’landscape technician’, ’landscape specialist’ and ’gardener’ describe the same job. In fact, these are professions with different levels of training, different authority and different responsibilities. Knowing who you will work with on a project directly affects the result.

In this guide we clarify the difference between a landscape architect and a landscape technician in terms of training, authority, scope of work and role in the project process. We explain why working with the right professional is critical to the success of your project.

Who Is a Landscape Architect?

A landscape architect is a professional who has graduated from a four-year university degree in Landscape Architecture and is qualified in the design, planning and management of open spaces. Their training covers design, plant science, ecology, soil and water management, urban planning, technical drawing and project management.

A landscape architect’s core area of authority is design and project development. They make holistic decisions about how a site will take shape functionally, aesthetically and environmentally, prepare the technical drawings and supervise the construction to ensure it follows the design.

A Landscape Architect’s Responsibilities

Concept and design development: after analysing the site, they set the overall form of the project, its areas of use and its design language.

Technical drawings: they prepare the detailed technical drawings, planting plans and material specifications the construction team will use.

Plant palette: they select plants on a scientific basis to suit the climate, soil and design goals.

Project management and supervision: on large projects, they check that construction follows the design and guide decisions on site.

Who Is a Landscape Technician?

A landscape technician is a technical professional who has graduated from a two-year associate degree in Landscape and Ornamental Plants or a similar programme at a vocational college. Their training is more practical: plant cultivation, planting techniques, maintenance, irrigation systems and on-site work.

A landscape technician’s core area of authority is construction and maintenance. They bring the landscape architect’s project to life on site and work on planting, maintenance and technical installation.

A Landscape Technician’s Responsibilities

On-site construction: they help carry out planting, hardscape and infrastructure work in line with the design project.

Plant care: they handle operational tasks such as pruning, fertilising, watering and monitoring plant health.

Irrigation installation: they work on installing and maintaining designed irrigation systems.

Site coordination: they contribute to the technical running of the construction team.

Key Differences at a Glance

Level of Training

A landscape architect completes a four-year bachelor’s degree and learns engineering and design disciplines together. A landscape technician completes a two-year associate degree focused on practical work. This difference directly determines the roles of the two professions within a project.

Authority and Responsibility

The landscape architect designs and signs off the project and takes technical responsibility. The landscape technician builds it, making sure design decisions are carried out correctly on site. On large-scale and public projects, technical responsibility lies with the landscape architect.

Role in the Project Process

In an ideal landscape project the two professions work together: the landscape architect shapes and supervises the design, while the landscape technician and construction team bring it to life on site. This collaboration safeguards both the design quality and the construction quality of the project.

What About Gardeners and Landscape Specialists?

A gardener is usually someone who cares for plants through experience, without formal landscape training. They are valuable for operational maintenance but have no authority over design or technical drawings.

’Landscape specialist’, on the other hand, is not a legally defined title and can be used by people with different levels of training. So when working with a company, it is important to ask about the team’s actual training and qualifications.

What Should the Right Team for Your Project Look Like?

The scale and scope of your project determine the team structure you need.

Small-scale garden landscaping: an experienced construction team may be enough, but input from a landscape architect always makes a difference to design quality.

Villas, homes and medium-sized projects: a structure in which a landscape architect designs and a technical team builds is ideal.

Hotel, residential complex, commercial and public projects: a multidisciplinary team led by a landscape architect is essential. At this scale, design, engineering and construction must be managed in an integrated way.

The soundest approach is to work with a company that manages the entire process under one roof, from design to construction, with both landscape architects and a technical construction team in-house. This model removes the gaps between design and construction.

Işık Peyzaj’s Professional Team

At Işık Peyzaj, with our landscape architects, agricultural engineers and experienced technical construction teams, we manage the entire process under one roof, from design to construction and maintenance. Our ISO 9001 certified quality management system provides a consistent quality assurance on every project.

For more on the stages of professional landscape design, see our guide to professional landscape design, or request a meeting about your project through our contact page.